Saturday, 28 October 2017

Postcards Around the World - October

A couple of days ago, I finished the October installment for my Postcards Around the World cross stitch - a few days ahead of the end of the month deadline, are you impressed??

This month it was New York. It was a fun one to stitch, even if I'm not sure about some of the colour choices. But I went with it because it still looks like fun, and it's obviously meant to be New York.

October - New York

The whole picture so far - September and October completed.
November and December will go along the bottom row next to New York. After that, I need to go to the top to start January, and I've sill got to stitch the top three frames for January, February and March (which is why you can't see them in the picture!) In fact, I've also got to finish the frame for April as well!!

Sunday, 1 October 2017

Something for Miss Beauregarde

Just a quick one to show you the Blueberry Muffins I baked today from my Mary Berry 100 Recipes Book - very kindly bought by a girl in my class last year as an end of year present!

The recipe is very simply plain flour, baking powder, caster sugar, lemon zest, melted butter, eggs, milk, vanilla extract and blueberries, to cook in the oven for 25 minutes.

Fit for Violet Beauregarde 
Ok, so the blueberries leaked a bit. But they still taste good so what does it matter?! =D Best of all, they're not so sweet so they'd make a good healthy breakfast muffin. That is, assuming there's any left of course!

Postcards Around the World - September

This was a Stitch-Along project I brought from Cloud Factory *ages ago*. The idea being that every month, starting from January, you get sent part of the design. Except, I forgot to start in January. So, I've decided to start with September in line with the academic year instead. Makes sense, right??!

September's postcard was Tokyo. I also had to stitch the white frames for other months so that I knew where to put this one, which took a fair bit of time, but the Tokyo postcard itself didn't take very long.

The Bigger Picture
The fabric that I've chosen is  hand dyed fabric that I bought online - it reminded me of old style postcards. I don't think the pictures do it justice -it's an oatmeal/brown sort of colour.

September - Tokyo
October is New York - a place I've actually been to! Stay tuned to see that one soon =)

Greetings!

A little while ago, I made some cards for some good friends of mine. It was the same weekend I'd been going through my old World of Cross Stitch magazines so I was inspired by the mini designs that they feature in their issues.

For Christina
This was a birthday card for a friend that I made using my Sissix Die cut machine. I cut squares of pink and blue squared paper and layered them on my blank card. Then, I used my Happy Birthday die to cut the main motif from pink card. Once I stuck it all down with foam pads, I stuck self-adhesive rhinestones in the corners. In total, a pretty quick design but I was happy with how it turned out!
For Kat


This was a mini cross stitch that I found in a past issue of World of Cross stitching. It took me a couple of hours to stitch and then I frayed the edges of the fabric. To make the card, I cut a square of blue card and stuck the cross stitch onto that with double sided tape. Underneath the blue square is washi tape. At the bottom of the card I put some more washi tape and a ribbon with a hand tied bow and then the "Congrautlations" wording came from my Sizzix machine.
For Claire


This was another mini design from a past issue of the World of Cross Stitch magazine. The whole article was a A-Z of Oriental designs. I picked this one because my friend loved her visit to Japan. Again, this one only took a couple of hours to stitch, and then I frayed the edges and mounted it on pink card with washi tape underneath.


I am also in the process of stitching Christmas cards for my sister-in-law. Yes, it's early, but still!! I won't post them yet because I don't know who they're for and I'd hate to spoil the surprise!!

Sunday, 3 September 2017

Ribbon storage hack

It's back to school tomorrow! Unfortunately, that means significantly less crafting time =( However, I did manage to do a quick project this afternoon that I thought I'd share with you quickly. Especially as it's more of a life hack rather than an artistic masterpiece.

This was an idea I saw from Pintrest - effective ribbon storage! Up until now, my rolls of ribbon have been in a box getting a bit tangled and this idea seemed to be an easy solution!


Post pliers treatment!
 All I did was find a wire coat hanger - I probably didn't choose the best one as it was quite thick to cut and was coated in white paint that flaked everywhere. I used a pair of pliers to untwist the top. Then, you can just put your rolls of ribbon on and twist the hanger back together again.

Now I can easily see which ribbons I have available to use in my scrapbooking and card making! It's hanging on the window latch in my craft room The bad news is, that hanger is now full so I'll either have to stop buying ribbon or find another coat hanger and make another one!

Complete with colourful ribbons!

So, it may be a while before I post any more craft updates, being back at school and all. But, I did make some cards that I'm rather proud of a few days ago, so when the recipients have got those I'll share them with you!

Tuesday, 29 August 2017

Project Garden Haven

Some of you will know that I'd been planning a surprise birthday barbecue for Bren for months. The key to this, obviously, being outside. So, when I saw that someone was giving away free garden furniture on Facebook I snatched it up quickly - 8 plastic chairs and a table, that'll come in handy thanks very much!

Of course, that was just the beginning.

Once my mum and I put that in the garden, we started to trim back some of the blackberry brambles. Anyone who'll have seen this in the first instance will know how that blackberry bush dominated my garden. The previous owners had planted it in a bunker in the back left corner of my garden, but blackberries also grow in from both neighbour's gardens - it's just everywhere. We were pulling on vines and finding that they extended through the trees into the neighbour's garden. It was like a horror scene from Jumanji. So, that's when we decided to take the whole bush out. Logic being, we still get plenty of blackberries from the sides of the garden if we want them, and the dogs only ever eat the thorns anyway.

2 hours later, the job was done. Unfortunately, I don't have a before shot as it was a rather spontaneous event. In those 2 hours, I started to plan other improvements that I might make in the garden.
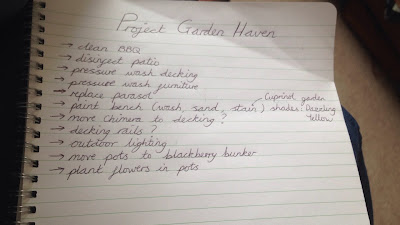
Just a small list...!

Basically, I'd set myself a mammoth task to be completed in 10 days. A visit from Groundforce wouldn't have been entirely unwelcome - out of me, Mum and Lizzie I wouldn't like to say who was Alan Titchmarsh!! 

Pressure washing the decking was a long, but oddly satisfying job. Who knew the decking was actually a different colour?? Then, once the furniture was installed I decided to buy a new parasol and base. This I was particularly pleased with, because I knew it had LED lights on the inside, but I didn't know you could change the colour of them - that was a great discovery after a few drinks!! =D
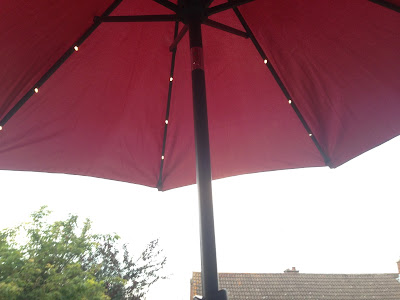
With white, red, green and blue LEDs

Mum and I also installed some more colourful plants where the blackberry bush was.
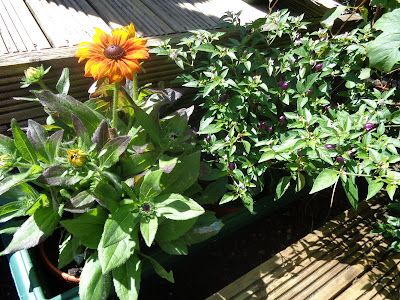
Cone flower and Chilli plant

Lavender and Hyacynth


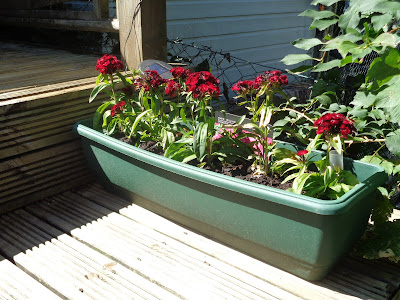
Sweet Williams

More Sweet Williams


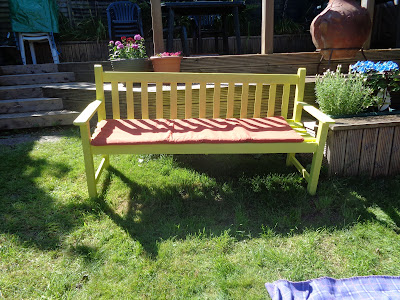
The biggest part of Project Garden Haven was repainting the wooden bench that used to be at my parents' house. When we first bought it to our house I remember saying I'd repaint it, then I said it again after Mum and I rescued it from underneath the mass of brambles. YouTube (and Liz) was a great help here!
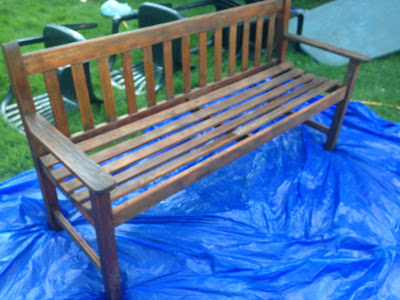
Bench: Before

First I pressure washed the bench, which cleaned it and also took off a lot of the old brown paint. Then, we used sandpaper to get rid of all the paint and to get smooth, bare wood. That took about 2 or 3 hours - we had skinned finger pads by the end of it, but it was a good result! I could have left it as it was had I not already chosen the new paint colour!

Bench: After sanding

Then, I put on 2 coats of wood preserve. At this point in Project Garden Haven, it rained on and off for 3 days, so there was a lot of concern about whether it would be finished in time. But then, the weather was glorious on one Sunday so I managed to get both coats of paint on and dry before it rained in the evening. I chose a lemon yellow, thinking it would stand out against the brown decking. And also, yellow is a bit more gender neutral than, say, purple!
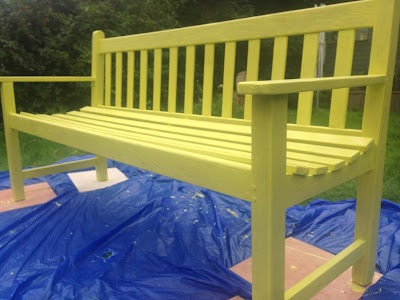
Painted - Cuprinol: Dazzling Yellow

In the only flat place in the garden!


After all of this, the garden was finally ready. Or, you know, as ready as it was going to be! From start to finish, including rain, it was about 10 days of work. The original plan was for my husband to see on the day of the party as he'd be home the night before when it was dark. Of course, he came home a day early so he saw the garden. I managed to tell him that it was just a summer project with no hidden agenda...! Thankfully, on the day of the barbecue the sun was out and everyone could enjoy the garden! Some of Bren's friends eve moved the chimenea up to the decking for us so we could have some heat in the evening =D
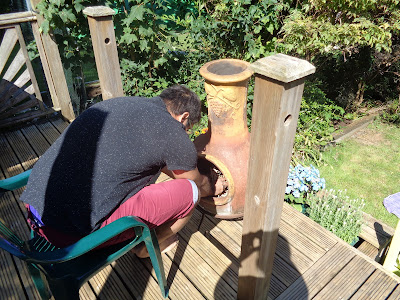
Kumbayah! 

Monday, 21 August 2017

My 16th Love Quilts Square

This square is for Ellie's heart themed quilt. For this, I decided to reuse the heart swirl pattern that I stitched before because it was so much fun. Ellie's favourite colours are pink and purple so I chose a 3 different shades of pink and purple and also a cream colour. I had fun balancing out all the colours. Once the black is stitched it's mostly just filling in he swirls :)


Hopefully, Ellie will like it and it'll look good with the other heart themed squares on her quilt.

I haven't signed up for any more Love Quilt squares right now, so I will return to my wedding photo cross stitch and - as lots of people have been asking - post an update of that soon!